Thursday, November 20, 2014

How Do I Choose the Right Jewelry? - Chain Types

The use of chain in jewelry design has always been an important element.  One of the most common uses of chain is as a foundation for holding a pendant.  From the single diamond to an intricately woven wire pendant, chain has graced the necks of many women and men throughout the ages.  In more recent years, chain has become more popular and has, as a result, taken on new dimensions.  Here are some samples of the types of chain available on the market.


Cable chain:  also known as link chain, this chain consists of the same size round or oval links. This is one of the most popular styles for displaying a pendant or gemstone.

Ball chain:  also known as bead chain, resembles round beads evenly spaced along a piece of chain with a small space in between each bead.


Rolo chain:  this chain consists of round links usually the same size and connected together.

Figaro chain:  this chain has flattened links of several sizes, laid out in a repeating pattern.  Usually the pattern is 2 or 3 short links then a longer link.

Curb chain:  also known as gourmette chain, this chain closely resembles cable chain, but the links are usually lying flat.

Chain comes in many metal finishes and colors.  Fine silver, sterling silver, gold and silver plate are the standbys. But newer types of metals and finishes are being used too.  As the price of silver and gold increased,  additional types of chain were created for use in jewelry making: silver filled, gold filled, nickel, aluminum, steel and rhodium.

The chain category also includes more elaborate chain types, often combining forms of chain with other elements. For example, cup chain  includes a crystal or pearl in a setting that has been attached to chain in the form of a link.
Silver silk capture chain consists of fine wire knitted around tiny ball chain, capturing the light that reflects off the ball chain and adding strength to the knitted wire.

iKandies Unique Custom Jewelry incorporates many different chain styles and colors into their custom jewelry pieces.  Below are two examples of how we do this.

 Hundreds of tiny copper plated leaves dangling from antique copper plated chain serve as the backdrop for pearls and Swarovski crystals in our Copper Pearly Waterfall Necklace.  


 In our Copper Leaf Necklace, large copper oval links joined together with smaller round links provide the chain base for a copper leaf and boro glass.

To see more ways that iKandies Unique Custom Jewelry uses chain in their necklaces, bracelets and earring designs, please visit our shop at Etsy or our website at www.ikandies.com.


Friday, October 31, 2014

How do I find the right piece of jewelry? - Choosing a Necklace

There are several things to consider when choosing the right jewelry to wear with a specific outfit.  What is the predominate color of the outfit?  What is the occasion?  What is the season of the year? What type of "look" do you want to achieve?

 When selecting a necklace, not only do you think about color, occasion and season but also to be  considered is the neckline.  For example,  if wearing a V neck,  your necklace should match the "V" shape created by the neckline.  For a scooped neckline, almost any style will do.

The length of the necklace varies depending on the neckline style. Here is a brief description of necklace styles and a diagram showing where they would hang on the average woman:

  • 12 inch - fits around the base of the neck, is usually worn for formal occasions and is referred to as a Collar Necklace
  • 16 inch necklace is slightly longer than a collar, often has a pendant attached and is referred to as a Choker Necklace
  • 18 inch necklace is the most popular necklace length choice, looks great for everyday wear, often has charms or pendants attached and is  referred to as Princess Necklace
  • 24 inch - falls around the bust line and is often referred to as Matinee Necklace because it's a good choice for evening wear
  • 28-30 inch - often worn for formal wear, can be doubled around the neck and is referred to as an Opera Necklace


iKandies Unique Custom Jewelry offers a range of necklace styles and lengths.  Be sure to check them out at www.ikandies.com!


Tuesday, October 21, 2014

New Tool - Quick Start Peyote Card

iKandies was able to attend Beadfest Philliadelphia this year and we had a ball!  Checking out all the vendors' offerings, attending classes, looking at new products - it was a busy three days. While browsing the show floor, iKandies was drawn to a demonstration of Deb Moffett-Hall's Quick Start Peyote Cards.   If you've ever worked with Peyote stitch you know why this would catch our eyes.

Several weeks prior to the show we started to make Fusion Bead's "Harlequin Bracelet" but had difficulty getting it going.  It's that pesky Peyote stitch! The Quick Start Peyote Card eliminates the confusion that we often have while stringing the first three rows.

The cards come in several sizes that match the size seed bead to be used - 15, 11, 8, and 6.  iKandies purchased the Combo pack so we could try it out with any size seed bead.

The cards are made of "durable laminated material".  They look like they would hold up well, but we were also told we could use them as templates and make new cards should we need them.

Our first attempt at using the card with size 11 beads went well.  As the beads are strung, they fall into small "slots" that are formed when the cards are folded.  This keeps the beads evenly spaced and makes for quick "pickup" when adding the next row.    Detailed directions and diagrams are provided and they are easy to follow.  Instructions are given for even count and odd count peyote.

iKandies can see where this will be a huge help in getting this bracelet project off the ground. We'll post the finished project and the rest of our review at a future date.


Monday, October 20, 2014

iKandies has a new website!

New iKandies.com website has launched!


iKandies has just released a new website!  It's still located at www.ikandies.com, only the webhost has changed.  What's new about this website?

Using Duda's Responsive Web Design, iKandies has created a website to look and react correctly on any device used to access it, whether it be a desktop, a tablet or a smartphone. Responsive web design does more than show the same content on a different sized screen. It adds functionality and removes unnecessary content based on the viewing device.

Why are we excited about the new website?  More and more people are "going mobile" by using smartphones and tablets.  Not only are they handy to carry but also easy to use.  Our responsive site makes a user's mobile website experience much easier!  


Here's a sample of how the pages may look depending on your device.    On the Smartphone view on the left, the menu is shifted to the upper right corner and content is lined up vertically to fit within the screen.


The Tablet view on the right more closely resembles the view seen when navigating the site with a desktop computer. 


Whether you choose to view the site with a desktop computer, Smartphone or Tablet, the same functionality exists for all devices.


The site is also platform friendly. This means that it is viewable on an Windows, Apple or Android device.

Try it out today.  Click on the link - iKandies Unique Custom Jewelry - to view our new website and let us know what you think!


Sunday, January 12, 2014

iKandies Plays With Patinas

According to Merriam Webster's online dictionary, a patina is defined as "a thin usually green layer that forms naturally on the metals copper and bronze when they are exposed to the air for a long time".  iKandies LOVES that look, especially on copper.  But, who wants to wait for a result that may take "a long time" to develop?  And what if we want a surface color other than green? So, iKandies has found other ways to color our metal that do not involve the use of chemicals.


In this experiment, iKandies applied a micro torch to copper washers. In just a few minutes the washers glowed various colors of red and orange, and a few washers reached the purple stage.
 In this experiment, iKandies used a heat gun to apply steady heat to a piece of copper.  Light shades of orange and red began to appear.  But in order to achieve these colors, the torch had to be held steady, concentrating on one spot and for 5- 7 minutes.

In our final experiment, we buried copper, nickle and brass leaf shapes in crushed salt and vinegar potato chips to which a few tablespoons of white vinegar had been added.  After waiting about 1 hour shades of blue and green began to appear on the metals.  This picture shows the results of leaving the metal buried in the chips over night.


iKandies was very happy with the test results.  Here's the jewelry piece we created using the copper washers.  What do you think?


Monday, November 25, 2013

These Boots Were Made For More Than Dancin !

A recent search by iKandies on Pinterest for interesting shoe designs resulted in this page of Shoe Decorating Designs http://www.pinterest.com/linzifer/shoe-decorating-ideas/.  Some of these are quite unusual  You can decide if you like them or not, but regardless of your decision, we're sure you'll agree adding "eye candy" to shoes and boots is definitely the "in" thing to do!

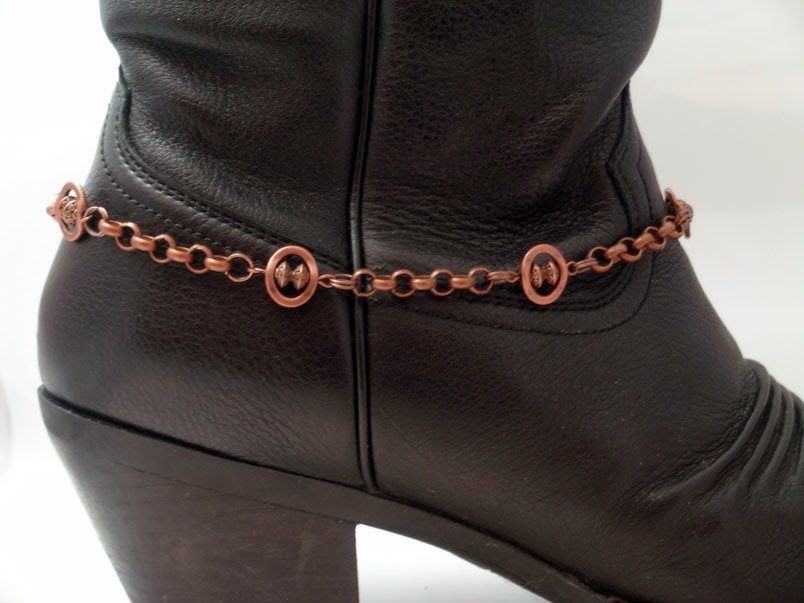
iKandies noticed the trend and decided to add a few Boot Bracelets to our line of jewelry to test the waters.  We're happy to report that they've been a popular item: not only showing up at the top of our Search list on our iKandies Etsy Site site, but we've also sold several of our designs.  Although they may be simple designs, they're very flexible because they can be worn on any number of boot styles. 

Our designs range from simple copper chain


..to more ornate chain with charms


 ... to a leather buckled strap with Swarovski crystal accents


We'll soon be enlarging our boot bracelet offerings by adding a few fun designs. So no matter what your preference, you're sure to find something to make those ordinary boots do more than dance!

Tuesday, October 29, 2013

iKandies Does Hot Glass

A few years ago at the Bead and Button Show in Milwaukee, iKandies took a lampworking class in which they attempted to make glass beads.  iKandies has always been fascinated with glass and thought this would be a fun way to experiment with it. We learned about the properties of glass, torches, marvers, glass rods, safety...  We found out this art is much harder than it appears!  Although our beads weren't that great, and we haven't attempted to make any more, this class has given us a much greater appreciation for the skills and talent of the glass bead makers we meet!

Recently iKandies had the opportunity to try our hand at glass blowing.  Akron Glass works held a class where we learned some of the basic techniques and had a chance to get the feel of what is involved in this art craft while we made a glass pumpkin with instructor Jack Baker.

Jack walked us through the basic steps - quite a lot involved in making this pumpkin!  He described the procedures and tools, then let us pick glass colors we could use for the body and the stem.
 
 You don't realize how hot these ovens can be until you get real close to them! Here we are heating up the pipe to prepare it for our instructor, Jack, to gather hot glass from the oven.


Jack has now added several layers of glass, including the colors we have chosen, and reheated it.  The oven behind him is where he gathers the molten glass.  The temperature is around 21000 degrees! We are using Jacks (the tool in my hand) to carve a line at what will be the bottom of my pumpkin so that it can be broken off the pipe.


All the layers of glass have been added and we're setting it in the pumpkin mold.

It takes a lot of air to help coax this pumpkin into shape, but here's the final product.  We keep the top hot with a blow torch while Jack prepares the stem.  After he adds it, the pumpkin goes into the kiln for overnight baking.


And here's the final product!


Kriss' Pumpkin!

Watch this YouTube video showing some of the steps involved in making our glass pumpkin, demonstrated by Debi and our instructor, Jack:


Saturday, October 26, 2013

Of Dogs and Leather ....

Leather clothing and accessories have become all the rage this past year.  Everybody is buying, selling, or wearing it and recently I found that one of iKandies' canine friends has suddenly taken to leather too. She not only likes to wrap herself in it but has been including it in her diet.  We lost several leather bags, a book cover, and some of our leather jewelry supplies to this leather-loving carnivore.  The other day I found her in the final stages of devouring a leather bracelet I had been working on. Maybe all she wants is a leather collar...

Regaliz Black Leather Bracelet for Men
Regaliz Purple Leather Bracelet

 So iKandies has added a few leather pieces to their line of jewelry, like these leather bracelets.  The black and purple bracelets are made of Regaliz Italian leather while the blue bracelet is leather cording.

Blue Larimar Jasper Wrapped Bracelet
A source of some of our leather has been the online wholesaler, Best Beads.  We also saw them at the 2013 Bead and Button Show.  They have all sorts of leather sizes, styles, colors including the newly popular Regaliz Italian round and flat leathers.
.
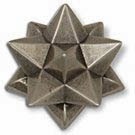
iKandies recently visited a local Tandy Leather Store to search through their scrap bins for unusual pieces to incorporate in their jewelry. We also found a few accessores we'd like to include as we design our jewelry, like this Pulsar Star concho  and easy lock bracelet clasps.


Many fashion trends come and go but it appears that leather is here to stay, at least for a while longer. 

Tuesday, October 15, 2013

iKandies and Glass Fusing!

iKandies tried something new over the weekend: glass fusing!  A local glass studio, Akron Glass Works, began the annual offering of glass fusing and glass blowing workshops.  At the last minute, iKandies decided to sign up for a glass fusing class, and we're glad we did!

Pistol Grip Glass Cutter
We thought glass fusing involved using a torch so we were surprised to learn the process is done in a kiln.  Layers of glass are heated to a temperature from 1100 to 1700 degrees and as the glass reaches a molten state, the pieces are fused together. Since not all glass expands or contracts at the same rate, the glass must be compatible. We learned about the coefficient of expansion - COE - or the rate at which glass expands when heated. To prevent the glass from cracking during the cool down process, he COE of the glass being used must be the same. We also learned about some new tools like running pliers - a tool used to break glass by hand along a scored line made on the glass and a pistol grip cutter which is used to score the glass before breaking it into pieces.


Glass pieces, copper foil and tools
Then we discussed patterns, cutting the glass and positioning it on our base piece.  We were shown how to layer the glass and add decorative features such as copper foil, glass frit (crushed glass) and glass stringers (long string like pieces of glass).

Running Pliers used to snap off scored glass


Scoring the glass wasn't hard, but cutting anything other than a simple shape was!  So we stuck with a simple design: a tree made with fall colors.


Positioning the glass

We chose transparent glass so that we could layer copper foil between some of the leaves and the base glass.  Then we applied glue to tack the pieces in place before firing the project in a kiln.  The kiln is a large floor model that is heated to 1480 degrees in order to fuse the glass properly.


Ready for the Kiln


We learned about glass slumping or allowing the glass to heat and then "slump" into a prepared mold while in the kiln.  The molds are made of clay or stainless steel.


The finished product!  


Thursday, January 24, 2013

Beauty Beneath the Ground


When iKandies first began to bead, we stuck to glass - Czech glass, Swarovski crystals, seed beads - components that can be found at a local craft store.  But soon we became enthralled with gemstones, especially after our first trip to the annual Bead and Button Show in Milwaukee.  There we discovered vendor after vendor displaying gemstones we never dreamed existed. Each year we found something new, and 2012 was no different. Bronze Infused Purple Turquoise - now that was a sight to behold.

Gemstones are just rocks, minerals or organic material that have been cut and polished so that they may be used for ornamental purposes. They generally fall into two categories: precious gemstones like diamonds, rubies and emeralds, or semi-precious like lapis lazuli and amethyst.  Organic material such as pearls and petrified wood are often classified as a gemstone, too.


Earlier last year iKandies visited the Petrified Forest in Arizona and brought home several pieces of petrified wood from the souvenir shop. Since petrified wood is composed mostly of crystallized minerals, they closely resemble rocks.  Smaller pieces of polished petrified wood can be used in jewelry designs in place of other stones, as shown in the image to the right.


Recently, the hubby and I decided to have a new kitchen installed and when it came to selecting a counter top, we went with granite.  This meant a trip to a local granite warehouse and showroom, Mont Granite, and was that an experience! Hundreds of granite slabs from around the world were lined up and we were shown how to select the one we wanted. The colors ranged from white, greys and blacks to shades of green, pink and orange. The pink and orange combinations reminded us of the southwest, while the greens made us think of rolling hills.  On display in the showroom were examples of how granite can be used, in the kitchen, bathroom, on walls, outside by a grill, and on the floor.  Also, the company has some very artistic composites on display the showroom.  The image to the left is an artist's interpretation of mixing various sizes of petrified wood and back lighting it. The company also showed how a piece like this could be used in the home.  


Of course during our time at Mont Granite, I kept thinking of all the chips and pieces of granite that are discarded during the cutting and finishing process and how they could be used in jewelry designs.  Hopefully someone else close to the granite quarries has thought of this too, and they aren't going to waste!


No matter what your view of "rocks" may have been, we hope this blog post has shown you the beauty that is buried beneath the ground.


Friday, December 14, 2012

iKandies Adds Licorice to our Jewelry

Licorice?  Well, our name is "iKandies"!  But we don't mean licorice candy.  We're talking about Licorice leather or what is better known as "Regaliz" leather.  This is pronounced "reg-AH-leez" and has been all the rage in Europe.

The Regaliz bracelet component system consists of genuine Greek leather 6mm by 10mm in size and found in a variety of colors. High quality beads, caps and clasps in zinc and pewter are electro plated with 99.9% sterling silver.  Ceramic large hole beads and rubber rings add color and style options to each bracelet.  The nature of these bracelets make them appealing to both men and women.

Seen first at the 2012 Bead and Button Show, iKandies began noticing more and more bead supply stores offering these components.  So we tried our hand at making a woman's and a man's bracelet and here's the results:

Men's Regaliz Leather Bracelet
Women's Regaliz Flat Leather Bracelet
The Regaliz system includes ceramic beads, rubber rings and other pieces to adorn and finish your leather bracelet creation. We decided to create sterling silver metal slides for the Men's bracelet.  The sterling pieces were textured, annealed and then formed into slides that would fit on the leather cord.   For the woman's bracelet, we textured, annealed and oxidized a copper component to attach to two strands of flat Italian leather.  A Swarovski flat back crystal was glued to the copper piece, creating an eye catching focal point for this bracelet. 

We were able to attain quite a bit of leather from our supplier, Primative Earth Beads, so we'll be making more of these luscious bracelets!  Check out our website for these and other fine pieces of jewelry.

Tuesday, November 20, 2012

iKandies Up Cycles Data Cartridge Storage Boxes

By day I am a network administrator for a small company. Up until a few months ago our critical computer systems were automatically backed up during the evening to an HP Ultrium data tape drive.  Recently, we replaced this system with a new process that no longer required data cartridges.  What to do with the cartridges and their plastic storage boxes?

While the tapes must be destroyed, I was hoping to find another use for the storage boxes. These boxes are approximately 4 1/4 inches square, made of a sturdy plastic and have a flip top.  While many jewelry packaging options are pretty, they are not always practical for shipping or transporting delicate jewelry items. So iKandies decided to put these boxes to use as packaging for our jewelry items.

We setup an account with Moo.com and created labels that featured pictures of many of our jewelry items.  These images, along with information about iKandies Unique Custom Jewelry, were combined to create a variety of labels that can be fixed to the top of the plastic storage boxes. Not only do we have something to decorate the boxes, but also another way to advertise our business.

To use the box we simply pop up the lid, place a tissue paper wrapped jewelry piece inside and click the lid closed.  Each jewelry piece is protected inside its cocoon, nestled in a cute, reusable plastic box!

Look for our new packaging the next time you order from iKandies Unique Custom Jewelry.

Finished Stamping Project

The stamping project referred to in iKandies last blog post has been finished!   We had just finished stamping the diamond shaped copper pendant and was preparing it for oxidation.  After dipping it into a bath of liver of sulfur, the pendant was polished  front and back to remove most of the oxidized affect.  The black coloring that was left enhanced the stamping design on the pendant.  For the next step  fine copper wire was laced through holes that were punched along the sides of the pendant.  The wire was woven in a random pattern back and forth along each edge, and Swarovski crystals, small Czech glass beads and copper disks were added to the wire during the weaving process. Several layers of wire and beads were added to fill in the design.


Finally, the neck of the pendant was rolled towards the back to form a bail so that it could be attached to an antique copper chain.  Here's the final result.  Not too bad for the first stamping project!


This was fun although we have to admit, it takes some practice to get the stamped design straight.  Our next project will tackle letter stamping.

Tuesday, November 6, 2012

iKandies Gets to Play With Hammers!

Recently, iKandies has been delving into the world of sheet metal and hammers.  A new book by Lisa Niven Kelly, "Stamped Metal Jewelry: Creative Techniques and Designs for Making Custom Jewelry" caught our eye because of the unique designs she had included that used stamping techniques.  We watched the DVD tutorial which outlined the steps needed to make clear stamped designs on metal.  She also included tips such as her "tilt n' tap" method of ensuring that a great impression is made on your metal.   Another helpful tip that she shared is lightly polishing the surface of the metal to be stamped.  This causes a reflection on the metal and it then becomes easier to see where to place your stamp.  This is a great help for lining up letters if you are stamping a word or phrase on your metal!

We checked our supplies and found some of the items we needed at Bead Fest Philadelphia and others online.  Beaducation, P. J. Tools and Fusion Beads are just a few of the places to find great stamps.  Not only will you see a variety of letter designs, but many design stamps representing shapes and images of people, animals and other items that will make your designs personal.


Aren't these the cutest stamps!
Next, we selected a project from Lisa's book:


We practiced stamping several designs, utilizing the "tilt n' tap" method.  It works great, by the way!

Then we started with our design:  cutting the copper sheet metal into a pendant shape, filing the edges, taping the shape to a bench block and filling the front with our chosen design.  Here's the project after stamping is complete and holes have been punched along the edges.  Now we're ready for wire wrapping the edge!  But first, we'll need to give the pendant and the wire a bath in Liver of Sulfur. This will give the piece an "antiqued" look.  Then the pendant and wire will be lightly polished to remove excess oxidation from the design and refine the "antiqued" look.

Silver Black can be used in place of Liver of Sulfur on sterling silver, brass and nickle.  It can be applied with a Q-tip just to the area to be darkened (the words stamped onto a charm, for example) for immediate results. A Pro Polish pad can be used to polish off excess black.

Please check back on this site for our continuation blog of this project as we oxidize, wire wrap the edge of the pendant, make the bail and attach the pendant to a chain.