By day I am a network administrator for a small company. Up until a few months ago our critical computer systems were automatically backed up during the evening to an HP Ultrium data tape drive. Recently, we replaced this system with a new process that no longer required data cartridges. What to do with the cartridges and their plastic storage boxes?
While the tapes must be destroyed, I was hoping to find another use for the storage boxes. These boxes are approximately 4 1/4 inches square, made of a sturdy plastic and have a flip top. While many jewelry packaging options are pretty, they are not always practical for shipping or transporting delicate jewelry items. So iKandies decided to put these boxes to use as packaging for our jewelry items.
We setup an account with Moo.com and created labels that featured pictures of many of our jewelry items. These images, along with information about iKandies Unique Custom Jewelry, were combined to create a variety of labels that can be fixed to the top of the plastic storage boxes. Not only do we have something to decorate the boxes, but also another way to advertise our business.
To use the box we simply pop up the lid, place a tissue paper wrapped jewelry piece inside and click the lid closed. Each jewelry piece is protected inside its cocoon, nestled in a cute, reusable plastic box!
Look for our new packaging the next time you order from iKandies Unique Custom Jewelry.
We're beaders and we're different! We use lots of techniques, components and styles and we're always looking for something new to invent! Please enjoy the blog and learn more about us.
Tuesday, November 20, 2012
Finished Stamping Project
The stamping project referred to in iKandies last blog post has been finished! We had just finished stamping the diamond shaped copper pendant and was preparing it for oxidation. After dipping it into a bath of liver of sulfur, the pendant was polished front and back to remove most of the oxidized affect. The black coloring that was left enhanced the stamping design on the pendant. For the next step fine copper wire was laced through holes that were punched along the sides of the pendant. The wire was woven in a random pattern back and forth along each edge, and Swarovski crystals, small Czech glass beads and copper disks were added to the wire during the weaving process. Several layers of wire and beads were added to fill in the design.
Finally, the neck of the pendant was rolled towards the back to form a bail so that it could be attached to an antique copper chain. Here's the final result. Not too bad for the first stamping project!
This was fun although we have to admit, it takes some practice to get the stamped design straight. Our next project will tackle letter stamping.
Tuesday, November 6, 2012
iKandies Gets to Play With Hammers!
Recently, iKandies has been delving into the world of sheet metal and hammers. A new book by Lisa Niven Kelly, "Stamped Metal Jewelry: Creative Techniques and Designs for Making Custom Jewelry" caught our eye because of the unique designs she had included that used stamping techniques. We watched the DVD tutorial which outlined the steps needed to make clear stamped designs on metal. She also included tips such as her "tilt n' tap" method of ensuring that a great impression is made on your metal. Another helpful tip that she shared is lightly polishing the surface of the metal to be stamped. This causes a reflection on the metal and it then becomes easier to see where to place your stamp. This is a great help for lining up letters if you are stamping a word or phrase on your metal!
We checked our supplies and found some of the items we needed at Bead Fest Philadelphia and others online. Beaducation, P. J. Tools and Fusion Beads are just a few of the places to find great stamps. Not only will you see a variety of letter designs, but many design stamps representing shapes and images of people, animals and other items that will make your designs personal.
Aren't these the cutest stamps!
Next, we selected a project from Lisa's book:
We practiced stamping several designs, utilizing the "tilt n' tap" method. It works great, by the way!
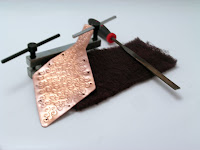
Then we started with our design: cutting the copper sheet metal into a pendant shape, filing the edges, taping the shape to a bench block and filling the front with our chosen design. Here's the project after stamping is complete and holes have been punched along the edges. Now we're ready for wire wrapping the edge! But first, we'll need to give the pendant and the wire a bath in Liver of Sulfur. This will give the piece an "antiqued" look. Then the pendant and wire will be lightly polished to remove excess oxidation from the design and refine the "antiqued" look.
Silver Black can be used in place of Liver of Sulfur on sterling silver, brass and nickle. It can be applied with a Q-tip just to the area to be darkened (the words stamped onto a charm, for example) for immediate results. A Pro Polish pad can be used to polish off excess black.
Please check back on this site for our continuation blog of this project as we oxidize, wire wrap the edge of the pendant, make the bail and attach the pendant to a chain.
We checked our supplies and found some of the items we needed at Bead Fest Philadelphia and others online. Beaducation, P. J. Tools and Fusion Beads are just a few of the places to find great stamps. Not only will you see a variety of letter designs, but many design stamps representing shapes and images of people, animals and other items that will make your designs personal.
Aren't these the cutest stamps!
We practiced stamping several designs, utilizing the "tilt n' tap" method. It works great, by the way!
Then we started with our design: cutting the copper sheet metal into a pendant shape, filing the edges, taping the shape to a bench block and filling the front with our chosen design. Here's the project after stamping is complete and holes have been punched along the edges. Now we're ready for wire wrapping the edge! But first, we'll need to give the pendant and the wire a bath in Liver of Sulfur. This will give the piece an "antiqued" look. Then the pendant and wire will be lightly polished to remove excess oxidation from the design and refine the "antiqued" look.
Silver Black can be used in place of Liver of Sulfur on sterling silver, brass and nickle. It can be applied with a Q-tip just to the area to be darkened (the words stamped onto a charm, for example) for immediate results. A Pro Polish pad can be used to polish off excess black.
Please check back on this site for our continuation blog of this project as we oxidize, wire wrap the edge of the pendant, make the bail and attach the pendant to a chain.
Subscribe to:
Posts (Atom)